Tag Archives: family food

Oh, honey, red beans and rice!

Let’s kick it!  One of my favorite dinner parties ever was a big group of friends huddled around our table all sharing a giant pot of red beans and rice.  I think it’s the subtle red pepper flavor that warms me up and makes me want to come back for more.

Soak up your red beans the night before.

FIll up a big pot with 6 c. water and the red beans.  Add 1 or 2 c. chopped onion, 3 cloves garlic, minced, 2 bay leaves, and 1/2 t. to 3/4 t. red peppers.  Simmer your beans for a couple hours, checking to see if you need water.  Here’s the tricky part:  you want the beans to cook down with a lovely thick “bean gravy.” You’re not aiming for soup.  Ideally you want to be able to serve your red beans on rice without needing to drain off water.  I cook my beans until they are tender and then, if I so choose, I add meat.  We like to use a ButterBall turkey sausage, sliced.  For you onion phobes out there, rest assured that 3 hours of cooking tenderizes onions into a fabulously flavorful but unidentifiable character.  You’ll never find them.

I don’t cook beans with salt or salty meat because I’ve learned that salt makes beans tough.  I just add my salt at the end.

Honestly, red beans have a great flavor.  I don’t think they need ham, sausage, or pork hocks.  Pork is expensive, so I just try to leave it on the shelf for Congress.

Here’s the cost:

1 bag red beans: $1.40

1 or 2 onions: $1.00 (at the most!)

garlic:  .30

bay leaves: oh for Pete’s sake, I have no idea.  I have a giant container I keep on the top shelf.

ground red pepper:  FREE if you save two packets from the next time you order out pizza

a sausage, if you must: $3.50.

rice:  .75

TOTAL:  $6.95    A budget deal!  Somebody call the Treasury Secretary.  I’m giving away an economic recovery recipe.

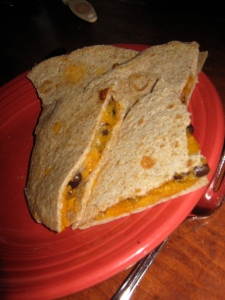
Black bean and sweet potato quesadillas

The kids love these!  Sweet potatoes and black beans are best buddies, I think.

We’ve been eating and enjoying the combo for a long time now, but the idea to turn it into a quesadilla came from a cookbook that a friend gave me—–“Simply in Season.” I’ve modified it with the low-budget knife and traded out the dripping boiled sweet potatoes for my roasted style.

About 4:00, I turn the oven on to 425 degrees.  I stab a few sweet potatoes with a knife, place them on a baking sheet.  They will bake until they pinch softly when I pick them up with tongs.  Obviously, the smaller potatoes cook up faster than the really big ones.  When they are done (sometime between 5:00 and 5:15), I cut them lengthwise with a knife to let the steam escape. When they’ve cooled at bit, I scoop the flesh into a bowl and mash.

About 5:00, I will make the tortillas–you can find that recipe  on my blog, but I won’t repeat it here now.  When I use thomemade tortillas for quesadillas, I will gently cook one side of the tortilla, flip it, then on the cooked side I will spread the topping.  I sandwich all that with another tortilla I’ve been cooking on another burner.  Obviously, store-bought tortillas save time and energy.  I try to make tortillas because I get to pick wholesome ingredients (whole wheat flour and olive oil) AND save the budget.  Tasty and inexpensive they are.

Heat a heavy skillet.  Spoon the mashed sweet potatoes onto the tortilla, top with a spoonful of black beans (drained from the can).  Top with your favorite cheese and another tortilla.  Cook for a bit, then carefully flip.   Transfer to a cutting board and cut into wedges.  Last time I made these I was in a hurry, so I just baked my “tortilla pies” in the oven.

Serve with sour cream and salsa.

Here’s the budget bottom line:

Homemade tortillas:   .48 for flour and .60 for olive oil and throw in some baking powder and salt = $1.15

Sweet potatoes: 3 lbs. @ .88 = $2.64

Couple cans of my black beans of choice:  “Ranch Style Black Beans”: $1.60

Cheese: $1.50

Condiments: $1.00

So far, we’re at almost $8.00.  Adding in a vegetable side will add about $2.00 if I make a salad or cook up a couple bags of frozen vegetables.  It looks like this meal ISN”T one of my uber-low budget busters (which by my own definition is $1.00 per person or less), but I still think feeding a family of 8 for $10.00 isn’t bad.  I’m still filing this one under budget meals.

And now for a link to the good folks at “Simply in Season” — http://www.worldcommunitycookbook.org/

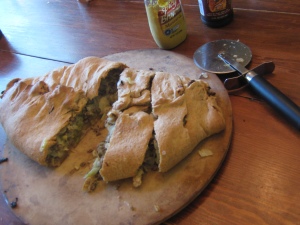
savory meat roll, or bierocks

Personally, I think the combination of beef hamburger, cabbage, onion, salt and pepper is terrific.  Cook it up, seal it in a homemade bread dough, bake it up, and eat it up with spicy mustard. Obviously, if cabbage terrifies you, this recipe is not for you.  But if you have ever lived in the land of German immigrant Kansas farmers, you know what to say.  “Yah, pass me the bierock!”

Forgive me, this recipe is not written for the bread novice or those fearful of inexact measurements.  If you’re worried about anything, just make sure the savory mix gets enough salt and pepper.  Cabbage needs salt.

INGREDIENTS:

1 lb. hamburger, but if you like to go heavy on the beef, of course more is fine.

thinly sliced cabbage–at least 6 cups, but more is fine, especially if you have to feed a crowd.  Believe me, it cooks down to a quarter the amount.

a goodly amount of onion.  definitely one big onion, but more is better.  hmmm…2 c. onion, chopped fine, that ought to do it.  Yes, 2.  As you see in the picture, onions make us cry.  

salt and pepper

bread dough  (if you need a recipe, mine will follow)

Brown your hamburger in a large dutch oven until it is almost done.  Add in cabbage and onion, salt and pepper to taste.  Cook until the cabbage and onion is tender and the juice has cooked away.  Don’t cook it to death, though.  Drain the mixture in a colander when you are done cooking.

Spoon the slightly cooled meat mixture onto your bread dough–have the dough spread out in the shape of a big pizza crust.  Seal it up in the bread dough so that it looks like a mongo calzone.  Pop it in the oven and bake for about 20-22 minutes or so.

BREAD DOUGH:

Herewith follows our pizza crust recipe.

1 3/4 c. white flour

3/4 c. wheat flour

1 t. salt

1 pkg fast rise yeast

2 T. olive oil

1 c. warm water

Mix the dry ingredients, then add the wet.  Knead until it is soft and pliable.  I should probably knead mine longer, but I am always in a hurry.  Let rise in a covered bowl until double.  Then roll out onto a baking sheet or baking stone.  Let rise again while your meat mixture cooks.  Spoon meat onto the bread dough, wrap, seal, and bake at 425 for 20-22 minutes.

Taco salad

This meal is fast.

Pop open a bag of tortilla chips.  Heat up 2 or 3 cans of beans, add seasoning if you like.  Serve at the table with grated cheese, sour cream, salsa, lettuce, onion and anything else you can find.  May God bless you with avocados on sale, which indeed just happened to me.  OH, yes, cilantro–if there is any way you can get fresh cilantro, please do!

Kroger makes a bag of tortilla chips (with no trans fats) for $1.19.  This works great for one meal for us.  A can of beans costs between $.70 to $.80.  Add in salsa, and cheese and this meal still can squeak under the $6 range.

Enjoy your beans!

Black Bean Burgers

Love those black bean burgers at Chili’s Restaurants. I have not quite achieved that kind of perfection here at home, but after a couple attempts, I’ve got a work-in-progress recipe that we will keep making.  Jerilyn sent me a recipe to start with–so thanks, Jerilyn!

Most of the recipes I’ve found online and including the one my friend sent, require a food processor.  We actually don’t have a food processor and when I tried it  in the blender, I was left with  2 T. of black sludge and 2 c. of perfectly preserved beans and onion.  The blender was out.  So, apparently, was the egg that I forgot.  I just have trouble following directions….and on top of that the uncooked onion chunks were a little much for even me, the onion eater.

On to the second attempt.  I’ve found that I can make black bean patties with a potato masher, no egg (yay, lower cholerterol!) and grated onions that add flavor, but no weirdo crunch in my soft bean patty.  This recipe is super easy and cooks up SUPER FAST.  It is also SUPER GOOD-FOR-YOU and SUPER LOW BUDGET.  I hope you will try it—–we really enjoyed them.

INGREDIENTS:

1 can black beans, WELL DRAINED

about 1/3 c. of quick oats (I think instant would work, too.  If you have Old-fashioned oats you may want to grind them up in a coffee grinder or blender first)

a few tablespoons of finely grated onion

seasonings–chilli powder, cumin, but especially SALT.  Did I mention you need SALT for these?

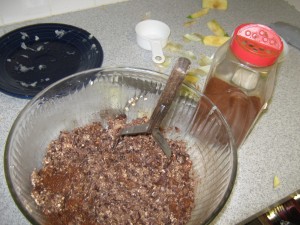
COMBINE all ingredients, mash up with a potato masher.  Form mixture with your hands into small patties–you can get about 5 happy meal size burgers out of one can.  (We use two cans and double the recipe for our family).  The mixture will look very strangely light colored–but the patty will cook up dark brown as the oatmeal cooks into the bean mixture.

Heat a heavy skillet and oil to cover the bottom of the pan.  Fry your patties for about 3 minutes per side.  They will get a bit crispy–but they really isn’t burnt.  Ummm, unless you burn them.   These cook super fast.

We served ours one night with buns–that was tasty.  The second night I had no buns, so we had patties topped with a delicious salsa, pasta and veggies on the side.  Salsa, sour cream, any kind of sauce is great for a topping.

Let me know if you try it out!  You may have some other ideas on how to make these, as well–so keep in touch.

Chicken Soup. Campbell’s Birthday Chicken Soup.

My kids ask for my homemade chicken soup for their birthdays.  Yep.

The ingredients list is fairly standard:  a chicken, water, onion, carrots, celery, peas, bay leaf, rice or noodles, salt and pepper.  But not one bit of Broth-In-A-Box.  The only tricky part is not cooking cluck-cluck too long.  Here’s the deal about chicken:  if you cook it a too long or too hot, the meat dries out to a gummy, rubbery texture, EVEN if it is in a big pot of water.  Boiling a chicken is even worse.

The best way to cook a chicken in water  is to use a heating method that ensures your chicken will never boil.  And, you have to actually check on the chicken.  This last time I did get sidetracked and it was a wee bit overdone.  The kids didn’t notice, however, and kept telling me how great it tasted.  I bet it will be the same for you.

You could choose to cook your chicken three ways:  on the stove in a big pot, kept very carefully at a slow, slow, slow heat–not bubbling.  You could use a very big crock pot on low for several hours (4 to 6) .  FInally, you could get a big oven proof pot and slow cook it in the oven.  I prefer using the stove top or crock pot–it’s just easier to check on it.  For years, I’ve done a stove top method with my big 12 qt. stock pot.  This time I decided to try out the crock pot since I had such good results with another recipe.  I still end up getting out a bigger pot for the stove  to mix everything up at the end, though.

I cook the chicken in water with a large amount of vegetables to add flavor.  The celery, onion, and bay leaf will get tossed out when the chicken is done, but I save the carrots.  I also leave the peel on my yellow onions when I add them to the pot.  It gives the broth a gentle yellow color.  One time I thought “More is Better!” so I added a bunch of peels and the water turned brown!!  Just a little goes a long way.

Ingredients:

1 whole chicken–about 4 lb.

as much celery as you can stuff into the chicken–several stalks, cut in half

1 or 2 onions, quartered, leave the skin on

at least 1 lb. of carrots, but 2 lb. is much better.  Peel the carrots, cut off the tops, BUT LEAVE THEM WHOLE–it’s easier to get them out of the pot and then you can cut them with a butter knife before you mix the final pot

a few bay leaves

water

noodles or rice

frozen green peas

If you are using a crock pot, stuff your chicken with celery stalks and onions.  Place it in the pot, tuck  the whole carrots (or break them in half) all around, onions as well, toss in the bay leaf.  Fill up with water.  Set your crock pot on a low temperature and let it gently heat for several hours. Check on the chicken–you can use a meat thermometer to tell you when it is done.  Obviously, the juices will run clear.  If you try to lift it out and it falls apart, honey, it’s done.    After you’ve cooked about 20 chickens, you will figure this out by looking at the bird.  If you can find your instant read thermometer–it may have been borrowed for a science experiment–you can use this handy dandy chart from the USDA.

USDA Recommended Safe Minimum Internal Temperatures

  • Steaks & Roasts – 145 °F
  • Fish – 145 °F
  • Pork – 160 °F
  • Ground Beef – 160 °F
  • Egg Dishes – 160 °F
  • Chicken Breasts – 165 °F
  • Whole Poultry – 165 °F

OK–so you have determined that your chicken is done.  Remove it from the pot and let it rest on a plate until it is cool enough to debone. Meanwhile, strain out the celery, onion, bay, and carrots.  Set the carrots aside.  You can ask one of your kids to cut the carrots because they will be tender enough that a butter knife will do the trick.  My kids love doing this part of the job.  Deboning a chicken isn’t hard–just pull off the meat.  Cut it into smaller pieces if you desire.  Let it sit on the plate, though, and as it cools a bit, the gelatin and juices will congeal.  All of that is GOOD STUFF.  Don’t throw out the flavor!

Meanwhile, pour your beautiful broth into a big dutch oven or other very large pot.  Sometimes I like to strain the broth by pouring it through a big colander lined with a thin cotten towel.  This will remove the little brown sediments from the chicken bones–but honestly, they won’t hurt anything and it does make a mess to strain it.  Don’t fret–just enjoy your broth.  You can cook your noodles in this broth if you like.  I think a 12 to 16 oz package would do the trick.  I like to cook up 1 to 2 cups of brown rice for our soups.  When the noodles (or rice) are close to done, add in a 12 oz. bag of frozen petite green peas and your carrots.  When the peas and pasta or noodles are about done, stir in the chicken.  You may need to add more water, of course. Finish heating your soup and generously flavor with salt and pepper.

This will make quite a bit of soup.  Save one lovely jar and take it to a friend.

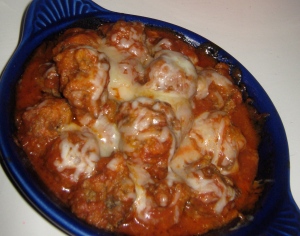
How to make people happy: Tamale Bite Meatballs.

We knew it was going to be a good party if my mom made tamale bite meatballs.  So here it is, the recipe you’ve all been asking for, straight off the index card, straight out of the 1980s—–the decade of little party meatballs.  Don’t bother making just one batch—–two is a must.

The following recipe is time consuming, expensive, fattening, and contains no beans.

Enjoy.

1 10 oz. can enchilada sauce

2. c. crumbled corn bread (if you are a jiffy cornbread person, 1 box will do the trick)

1 1/2 lb. of hamburger.  I think ground chuck works the best. Why?  Because it has fat, my friends.

1 15 oz. can of tomato sauce

monterey jack cheese, shredded

Whoop up that cornbread let it cool just long enough that you can crumble it.  In a mixing bowl combine the hamburger, cornbread, 1/2 c. enchilada sauce (this is about half the can, save the rest).  Form this mixture into small meatballs.  I like to use a small cookie/melon scoop.  At this point, you need to be aware that one of your toddlers will try to eat the raw meat.  There is nothing I can do to help you.  Sorry.  Form those up and place them on a baking sheet with sides.   Bake them at 350 degrees for about 20 minutes.

Meanwhile, in a small sauce pan stir up the can of tomato sauce and remaining enchilada sauce.   When your meatballs are done, place them in a dish, pour over the bubbling sauce, and top with the shredded cheese.  Really, the sauce should be hot enough to melt the cheese, but you can pop it into the oven if you like.  Of course, the microwave is an option, but the microwave is so tricky.  Overzapped meatballs turn into rubbery nuggets.  It seems like I remember my mom piling the meatballs and sauce into a crockpot before we would head out to the party–once we arrived, she would plug it in and top with cheese.

If you are a high plains native and most of your family has a German sounding last name, you should definitely serve these with some sort of potato:  baked, mashed, or scalloped.

If you are from the south, you should definitely serve these in your Grandmother’s silver plate chafing dish.

Wherever you are and whoever you are, you should make enough to share with friends.

Long live the party meatball.

baked potatoes topped with chili

We’re making use of that leftover chili tonight–baked potatoes with all the fixings.

How does one bake a potato?

I like to scrub mine up, stab with a fork, coat with a little olive oil, sprinkle with salt and place them on a cookie sheet.  I bake them at 425 for an hour or so.  I just keep checking on them at the end until they are just right.  I don’t use aluminum foil and my potatoes turn out great!  Sometimes I don’t rub the skins with oil and salt, either, and they are still just great.  Really!!  Baked potatoes are just baked potatoes.  I love to eat the potato skins.

This is an inexpensive meal for us–a bag of potatoes $3, leftover chili (free), plus cheese or sour cream $1.  That’s affordable!  And tasty!

last cold day–chili

It’s cold outside.  We’re having a bona fide Sunday afternoon rest time.  It’s the first day in days we haven’t painted, nailed, or spent the morning blazing a trail through Home Depot.  Ed put the last log on for a fire and I’m making chili.

Of course, we eat chili with beans.

Here is the recipe:

1 chopped onion

a couple cloves garlic, minced

1 green pepper, chopped

chili powder, salt and pepper, and cumin if you have it

1 lb. hamburger

4 cans of beans in varying shades of red happiness, just rinse off the corn syrup

1 28 oz. can  tomatoes (I use the crushed tomatoes at our house because of the tomato-phobes)

Get out your medium big pot–just the dutch oven, not the 12 quart one the kids use as a dolly diving pool.  Brown up your hamburger, onions, garlic and green pepper.  Add in chili powder, salt and pepper to taste.  When the hamburger is browned and the onions are tender, pour in the tomatoes and beans.  Add water if needed.  Simmer until the kids start begging for supper.  Serve with cheddar cheese!

Here is how you save money on this recipe:  Don’t buy those “Chili Seasoning” PACKETS. Look at the ingredients lists on those things!  It’s just chili powder (which is in itself a conglomeration of spices, salt and garlic) plus more salt and garlic and usually SUGAR and MSG.  It’s a MARKETING PLOY!  Be strong, friend,  just get chili powder and add cumin.

Easy Pasta With Beans

Easy Pasta With Beans:

We cook up 1 lb. of our favorite “big” pasta noodles–rotini or penne.  My current fave is the Ronzoni Smart Taste brand.  It has extra fiber, but it doesn’t taste gritty or as heavy as whole wheat pasta.  You can buy it at Walmart for $1.25 or at Kroger for $1.50.

While the pasta is cooking in well-salted water, I open up a can of kidney beans, rinse and drain.

Meanwhile, I borrow a fabulous little trick from Alice Waters and mince up a couple cloves of garlic–and a couple of stems of parsley if I am lucky enough to have it.  I measure out 1/3 c. olive oil.

As soon as the pasta is cooked to our liking, I drain it and pour it into a bowl.  Meanwhile, I pour my 1/3 c. olive oil into the pasta pot and heat it up a bit–then I add the garlic and parsley to the pan.  If the kiddos can handle it, it is so nice to add a few flakes of red pepper as well.  I will cook the garlic just long enough so that it starts to get soft and mellow out, but I don’t want to brown the garlic because it will taste bitter.  A very few minutes will do.  When all that is just right, I pour it over the pasta, add the can drained beans, and grate fresh parmesan cheese all over the top. The Butter Girl in the house is delighted when I supplement with a little butter.  Season with pepper.

The cost:  $1.25 for pasta, pennies for garlic and the seasonings, a couple quarters for olive oil, .80 for a can of beans, not more than $1 for the parmesan.  Add another couple $ for your veggie of choice.  TOTAL:  $5

If you have never used freshly grated parmesan, I beg of you to try it.  It may change how you cook.

Enjoy!